Sunday, 24 February 2013

What winter sunshine

Another week of steady if slow progress and only a few uninspiring photos to show for all the work. I really wasn't very happy about the length of the overhang on the kitchen island design and after thinking about it over last weekend I resolved to do something about it.


So on Monday morning I built another layer of support in front of the one I built last week. There is still 11 inches of space for knees and the whole thing looks much better balanced.


It doesn't look that different from the front but I am now happy that I have got it right. The difficulty now is deciding what I am going to make the top from. The two main contenders are granite/stone and wood. I was originally convinced that granite was the best option but since I have been researching options on the internet I am now not so certain. I have been looking at Houzz.com, which I very strongly recommend to anyone interested in home and garden design. I have been looking at rustic kitchen designs on the site and have found some very attractive alternatives to granite that I now feel may be more suited to my cabin.

While I was adding the additional support to the front, I decided also to make some temporary draw fascias to protect the inside of the draws while all the work is going on around the island. I bought some factory made fascias to get the dimensions right and then returned them. I am minded to make the final fascias and doors from beetle kill pine with it's lovely natural blue highlights.
For the remainder of the week I carried on with the wiring in the kitchen, this time getting all the recessed light fittings installed. For this I had to put in place first all the batons that will hold the dry wall boards that will go between the beams.


The ceiling here will be sound insulated to protect the bedroom above from the kitchen noise. To reduce the risk of fire, the building code requires isolation boxes for the recessed lights in order to separate them from the insulation material.
In total I have put in 12 x 50w lights. There is yet more wiring to do for the kitchen. Still required are separate circuits for the oven, the extractor fan above the gas cooker and the microwave.
I finished off the week putting in the wiring for the Thermostats for the base board heaters in the bedrooms. This took longer than anticipated because some re-routing of wiring was required. I should really have thought about this when I first started wiring but, fortunately, I had enough red 12/2 wire to finish the job without having to buy any more.

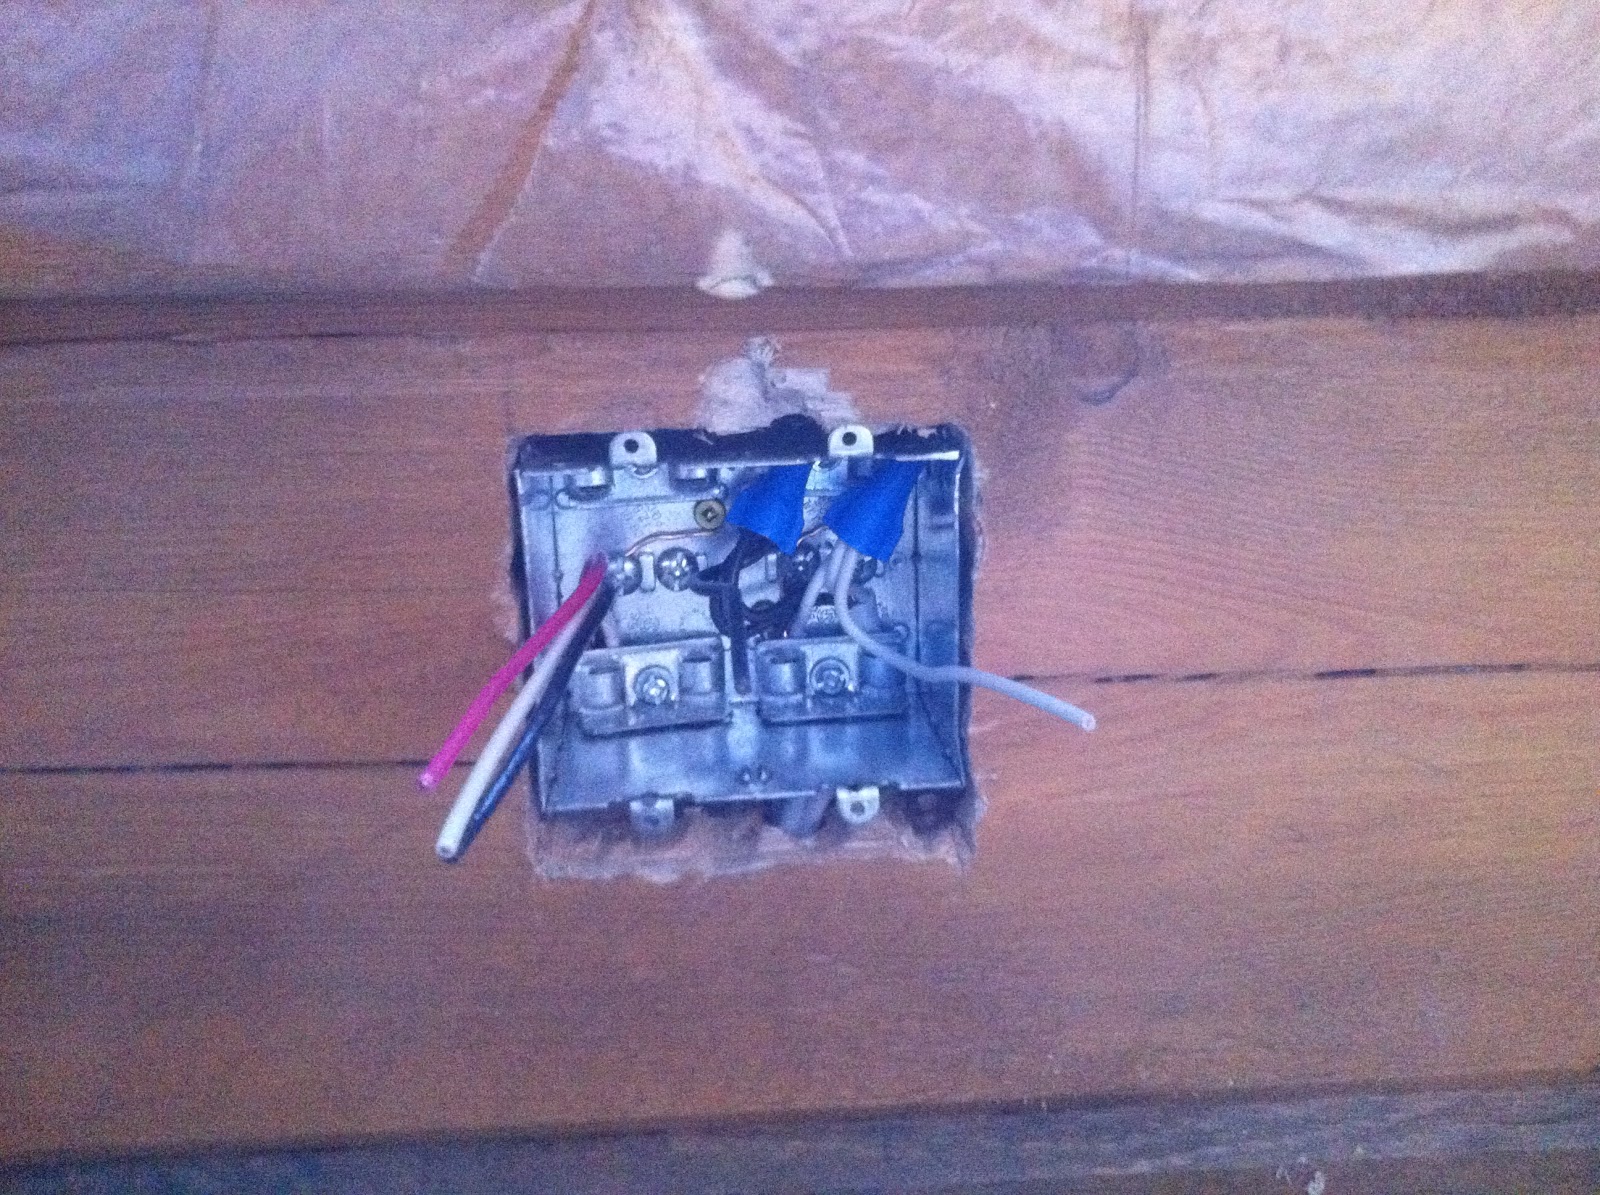
I also replaced some boxes that needed to be larger to accommodate two or more switches. Seen here are a Thermostat box on top and a double box for lights in Bedroom 2.
Weather permitting, I am going to take a break from the wiring next week and try to get the last remaining railings for the main deck in place. Kevin has promised to come out and give a hand and Stuart Doyle, who you may remember visited me in the autumn, is very kindly coming down from Northern Alberta to lend as hand as well. He is coming an equivalent distance to Yorkshire from the Sough of France and so it is a significant effort on his behave for which I am extremely grateful to him personally and to his wife who is lending him to me for a week.

I was going to wait until the spring to put these railings up, as I was concerned about them discolouring in the winter sunshine. The winter sunshine hasn't materialised and anyway the UV light levels are not high. I really just want to get them out of the house and get the deck finished, besides, it won't be long now before it is warm enough to stain them.

Thursday, 21 February 2013

Kitchen Island

Apologies to those that eagerly await a posting every Sunday evening. Last week was long and because I am working alone it was difficult to get much done to show you. Even the internet has been uncooperative. It keeps dropping out on me and it is very frustrating trying to upload photos to the blog when the connection keeps failing. Sometimes it takes me three or four attempts just to upload one photo. The weekends don't help either because all the kids are home from school during the day and the internet capacity can't cope.

Anway, enough moaning about the internet. I spent the first two days of last week clearing up all the mess from the previous two weeks and then planning the wiring for the kitchen. That required building the framework for the island, which the code requires me to put sockets (receptacles) in. So that's now done.


This is the back of the island and the plaque (actually gas top) will be over the draws. I haven't bought the draw fascias for the draws in the cabinet because I want to make them myself to fit in with the rustic look of the cabin. All the ones you can buy look very nice and many of them are of solid wood but, frankly, they wouldn't really suit the theme and feel of the cabin, so I am going to make my own doors and draw fascias. You can also see the two double socket boxes already in.


This is the view of the island from the other side and you can see the wall sockets in the far wall where all the cabinets and go. The wiring at the top two logs has been countersunk to enable me to cover them without difficulty with either tiles or boards, probably the former.
I put this temporary top on the island to give me a better feel for the full size of it. That way I can plan the lighting and other things better. I am a little concerned by the length of the overhang and may put in some more support underneath it to reduce it.

I have also finished putting all the railings for the main deck together. I may put them up before staining them, just to get them out of the way. The UV light levels are not that bad here in the winter and spring and so I am not concerned about them discolouring before I get around to staining them.

Sorry for such a short and sweet blog this week and for its tardiness but, better late than never. A semaine prochaine.

Sunday, 10 February 2013

"Time for bed." Said Zebedee

I am quite pleased with progress at the moment but it is going to slow down next week. I am now over half way to getting the electrical circuits roughed in and ready for inspection. Before I can complete the work however, I must put in a final stud wall on the landing for a cupboard but, I cannot do this until the new floorboards arrive and I don't have a date for them yet.

This is the first stud wall on the landing. It is the front of a large walk in closet for the main bedroom, there not really being enough room for a lot of closet space in the bedroom itself, without taking too much of the room up.

This shows the same closet looking in the other direction and you can see the area on the left at the far end where a similar closet for the second bedroom will go. Note the lack of floorboards there. 
Likewise, I have put in closet frontages for cupboards in the corridor leading to the North Wing (blame Tony Broom - he was the first to use the term). They will be for linen, other bedding, towels and the such.
Not much different from the other end of the corridor. I have had to put these in now so I can put socket (receptacle) and lighting circuits in the closets and corridors.

Putting circuits on stud walls is one thing, putting them through the logs is a totally different story. The 1/2" holes we pre-bored through the logs have proved far too small and we have had to bore virtually all of them out again in order to feed the wires through the logs to the receptacle boxes, which in the wood are metal - here a light switch ....

…. and here a receptacle box. There has been a little damage to the logs but, nothing that will not be covered or that cannot be repaired. 
The joy of working with wood is that it is generally pretty forgiving and none of the damage seen here will be visible when I'm finished. For those interested you can see two different circuits here. The one on the right of the photo is a standard two wire 110 v circuit and the one on the left is a three wire 240 v circuit for my UK printer and stereo system. Impressed? OK, not impressed.
 I did quite a lot of work in the basement this week. I put up the walls for the mechanical room which, for those uninitiated into these things, is where the furness for the hot air central heating system and the 'on demand' water heater will go. The manifolds for the hot and cold water systems will also be in there. Sadly, I forgot to take any photos so you will have to wait until next week to see this. Oh, alright, I'll take some photos tomorrow and post them here so you don't have to wait.


Most of the wiring this week will come off the main circuit panel in the storeroom. You can see the wires, all labelled ready to be connected to the box. I'll do this once all the circuits are in place. It is best to go in there once and get it over with. That way I can keep the power on uninterrupted. I also energised some of the circuits in the garage in order to give me power there for all the large power tools. I also connected the 240 v circuit for my UK tools and all this has already made life easier. I'm not sure if the inspector will be too happy but, I haven't done anything that hasn't already been done from the main box. I'll admit I did close my eyes when I first turned on the power to the sub-panel and energised the circuits, feeling a strange mixture of pride and relief that the whole thing didn't blow up. Anyway, it is all working as it should and I am particularly pleased with getting the 240 v circuit up and running from a 110 v system. I know that there is at least one person out there who will be impressed. I will also try to remember to post a photo of the garage circuits up and running.
Other work this week included top and tailing all the spindles that have yet to be used. I found that many of them were difficult to fit into the rails because of inconsistent work on the ends. I used a special tool for ensuring they are all the right size and took the opportunity to rationalise their storage while I was at it - again photos to follow.

While I was at it I made up a few of the railings for the deck, which you can see stacked up here. Quite a few more to make and I might get a chance to do some more next week. I just need some warm weather to stain them and then I can get them up, which will be difficult by myself.
Finally, on Saturday, I had a bit of a clean up on the ground floor and in the garage, not that I expect you will have noticed. If nothing else it made me feel better. In some ways it is a bit of a waste of time trying to keep the place too tidy and clean but, in other ways it's a good thing. It is nice to come to work to a tidy and clean workspace each morning and it helps to prevent damage to finished things already in place.
I'll sign off now.

"Time for bed," Said Zebedee.

Sunday, 3 February 2013

Feeling nearly faded as my dreams

Well I'm back in Canada, my winter break's lease having all too short a date. It seems that I took the Canadian winter with me to Blighty and I stepped off the plane at Gatwick into the blizzard that was engulfing southern England at the time. London, in my absence, has been transforming itself. Everywhere I looked there were cranes on building sites. Skyscrapers appeared to be rising all over the place and the new Shard was very conspicuous on the South Bank.

I stayed with my brother Clive in Cockfosters and he was in good form considering the challenges he is facing. His strength and forbearance in the face of adversity is inspirational, as is the dedication and devotion of his partner Yuliang who is supporting him through his illness.

It was good to see my own family, particularly my children but, it was a stark reminder, as if I needed reminding, of the price one pays for a failed marriage - and it stung, like a frozen lash. I would liked to have stayed longer and visited friends, especially those who have been following this blog but, it wasn't to be - not this time. And all too quickly the visit was over and I left the grey winter skies of England feeling nearly faded as my dreams.

I stayed a couple of nights in Calgary on the way back, thank you Jeanette for putting up with me, before making my way down to South East British Columbia. It took a couple of days to get back into the swing of things, picking up the threads I had left blowing in the wind ten days ago. When I saw the cabin, with the sun shining on it, it made me feel good again and feeling good about the cabin is good enough, good enough for me.

I continued with the wiring but, the main effort this week has been putting up the last steel brackets to tie the beams and posts together and then to finish off the stairs so at least I can now get from the basement to the top floor without having to climb a ladder. That will make life a tad easier.
This bracket and the one on the other side were the last two to go in. I had to suspend myself with climbing equipment from the beam above and hold the brackets in place with parachute cord while I drilled and bolted them in place. The Middle Wallop Climbing Club would have been proud of me.
I raised the top level of the platform and straightened up the steps, which some of you may have noticed weren't exactly perfectly horizontal. 
Looking back down the first flight. The wood burning stove has once again proved useful for a hot lunch every day.
The second flight going up to the top floor from the platform.
To make it easier turning the corner on the platform, I have trimmed the bottom step.
I also put up a couple of new stud walls on either side of the stairwell at the top end of the stairs (note the wiring) ….

…. and have started laying the 2" floor boards but, ….

because I had to use more boards than planned to raise the level of the platform, I shall now have to order some more to finish the job.
There is still plenty of wiring to do and I will get on with this as concurrent activity while I do other work and wait for the engineer to come and do his inspection.


I thought you might like to see this panoramic view of the sun rising over the Rockies opposite the cabin, taken from the road coming into the Development.

Sunday, 13 January 2013

How did we manage that?

Last week was a good week and quite a lot was achieved. First up, I made a start on the wiring and was helped by Tex and Kieth, who is now working with/for Tex. We started in the North Wing, which took two days to get everything done with three different types of circuits. AFCI (Arc Fault Circuit Interrupter) protected circuits (blue 14/2 wire) for the bedroom receptacles (sockets for UK readers) onto which we also put the bedroom lights, not because they have to be AFCI protected but simply to save wire, of putting a different circuit in just for them. We put in five baseboard heater circuits (red 12/2 wire) with one heater per circuit and finally three regular circuits for all the main room receptacles and lights, two of which are on three way switches.

These are not very exciting photos but, they do give you some idea of what is involved. The reel is mounted just for ease of unrolling the cable from it.

The first step is to decide how many of each different type of circuit is required in the area you are wiring, with a mind to how the hidden wiring is going to be routed. Then for each circuit in turn decide what type and where the boxes are required. If you look carefully, at the bottom of the wall in the foreground of this photo, you will notice two boxes facing inside the bedroom (far side of the wall) served by blue 14/2 cable indicating they are on an AFCI circuit and two boxes facing into the main room that are served by standard white 14/2 cable. Note also the red 12/2 cable coming up from below to provide power to a baseboard heater that will go between the two receptacles. As far as the building regulations are concerned the baseboard heaters will be the primary heating system in this part of the house and the wood burning stove will be the backup system. In practice it will be the other way around. If you were paying attention, I have already told you this.

There are generally four different types of boxes - receptacle boxes, light boxes, switch boxes and junction boxes. At this stage of the process most of them look the same but, their positioning, wiring and covers are all different and often restricted or guided by the electrical code. Plastic or metal boxes can be used and I have used a mixture of the two depending on where a box goes and what its function is.
I also connected the sub-panel to the main panel using a very heavy duty #3 cable. The sub-panel is now quite full and I am planning to put only another three circuits onto it. The wiring system here is very different to the UK but, it makes a lot of sense and despite the heavy code requirements is not difficult to grasp. Like all the building trades here, the system is designed for self builders like myself to be able to do it with the aid of good guide books and a rigorous inspection system.

Remember this from last week well, ….

…. it now looks like this. Note the really heavy duty cable on the left of the photo. This is the #3 cable bringing power from the main box in the basement. Note also that each cable is labelled and there is a table on the box cover plate, that hides all the wiring, that also indicates what each circuit is for. If you look carefully you may be able to identify the AFCI breakers. They are the three breakers with white coiled tails and white labels. They are wired differently with the neutral wire coming back directly to the breaker before going onto the neutral bus bar. Arc faults are therefore detected by the breaker before the circuit is completed thus reducing the time it takes to cut the circuit down to about 4/100 of a second. 
We also managed to do the wiring for the main bathroom, number 2 bedroom, the utility area and the garage. Three more circuits are required in these areas but, as they are circuits that require specific heavy duty wire, which I don't have yet, they will go in later. They are for; the dryer which has to be on its own 240 volt/30 amp circuit; the oven for the main kitchen and the range for the kitchen in the North Wing, each of which require their own 240 volt/40 amp circuits. All three require 2 pole circuits, if that means anything to you.

The main bathroom and number 2 bedroom. Again, you can see the white wiring for the bathroom and the blue for the bedroom. The receptacles in the bathroom will be GFCI (Ground Fault Circuit Interrupter) protected. This can be done at the receptacle itself or by a GFCI breaker in the panel. The former is the cheaper method in most cases (where there are only a couple of receptacles).

Most of the garage fixtures I have placed on the beam. This will keep the wiring from under the feet/car/larger bench tools and provide power to the lights. You can also see here some of the hidden wiring for the North Wing rooms above the garage. Eventually most of what you see here will be covered by the white board ceiling of the garage. Note the conduit for the wiring which is required to protect the bare wire.

At the workshop end I have put plenty of outlets. From left to right; standard double 110 volt/15 amp receptacle, split 110 volt/15 amp receptacle with top half controlled by a switch for the florestant light that will be plugged into it, the bottom receptacle will be live the whole time; standard double 110 volt/15 amp receptacle; Single 240 volt/20 amp receptacle for my UK power tools; and finally, another standard 110 volt/15 amp double receptacle. Got that, questions at the end.

Conduit and box for switch for light above garage entrance.
Not the garage entrance light but, recessed light above entrance to main cabin from the garage. This is controlled by three way switches in the garage and the threshold of the main cabin.
We also got some work done on the stairs to the upper level. I was going to install them today but discovered a little more work needs doing on the platform first. The bottom of the platform is at the right level but the top needs to be raised 3" - how did we manage that? Anyway, I have worked out a couple of ways we can do it without having to take it all down. I will discuss them with Kevin tomorrow.

Two views of the platform for the stairs up to the top floor.

It won't take that long to raise the top of the platform 3". I might need to buy some more wood to do it but it will be cheaper than starting again. The bottom of the framing has to stay at the same level in order to support the runners - bottom left of photo.
Last night the temperature dropped to below -20c and it froze the pipes under the cabins where I am staying. Kevin and Tex were away for the weekend at a game (animal) show in Pincher Creek in Alberta and so Keith was up nearly all night trying, in vain, to keep everything going. Even some of the lines in the main house froze. Luckily, everything is now back on line, thanks to Keith, so I got my weekly wash done - sad aren't I. I always keep 10 litres of water in a plastic can for just such occasions and so at least I had something to drink when I got up this morning.

There will not be a blog next week. I am going back to the UK on Wednesday for a week to see family - a late Christmas. I will post again in a fortnight - 'quinze jours' for my French friends, पखवाड़ा (Hindi) or پھواڑے (Urdu) to my friends in India, whoever you are.


Sunday, 6 January 2013

The last thing I need at the moment

Not the most exciting week in terms of progress but some solid planning and preparation nevertheless and we all know what PPPPPPP stands for. Electricians charge an arm and a leg for their labour and so I have decided to do all the wiring myself and it has taken me a couple of days to work out what my initial material and tool requirements are, which I have now bought.

I have continued reading up on the electrical code for installing all the wiring. There is a lot to take in. Most of it is pretty straight forward and just involves reading what is required for all the various tasks around the house. Different parts of the house are subject to specific requirements. Bedroom outlet circuits (as opposed to lighting circuits) for example must be protected by Arc Fault Circuit Interrupter breakers at the service panel. Kitchen and bathroom outlets within 1.5m of the sink/bath etc must be protected by Ground Fault Circuit Interrupters, either in the plug or with a GFCI breaker at the service panel, and so it goes on and on and on.

The more complicated stuff involves calculations for such things as the number of circuits required; the load on each circuit; what size wire and breaker each circuit requires; what footage of electrical baseboard heaters is required to heat a room (square footage adjusted by the number of outside doors and walls, ceiling height etc). It really does go on and on. It is not difficult stuff but, it does require attention to detail.


Some of the book work I have been boning up on. The little yellow book, which belongs to Tex, is particularly useful. It has over 40 different circuits illustrated, including two, three and four way switches - very handy. The Black and Decker book also comes with a CD but it is disappointing. What's on it is very good but, and it is a big but, there isn't much on it. If only they had made it more comprehensive it would be outstanding. There is also the internet, which I have found can provide most of the answers to questions I have about building your own home.
I have also had to obtain a homeowners electrical installation permit, which authorises me to do the work and which (as I mentioned last week) specifically forbids me now from employing anyone to help me. Unpaid friends and family are permitted but there aren't too many of them around here at the moment. I thought that the process of obtaining a permit was going to be tedious and lengthy but in the event it was neither. Maybe it was because I applied over the holiday period and the only person in the office was a little old lady who didn't ask too many difficult questions. All the inspectors were on leave.

I have started the work already. This morning I installed the sub-panel that will distribute power principally to the garage, north wing and utility area. 

Cable, different colours for different jobs. Blue for AFCI circuits in the bedrooms; Red, thicker cable for baseboard heaters; Yellow, same gauge as red for kitchen circuits. Loads of breakers, connectors, boxes, staples, nuts and steel plates for protecting cable where it could be damaged by screws or nails.

The sub-panel in place.
Other work has included getting rid of the half wall that was on the left hand side as you enter the cabin. A full sized wall is now required to support the landing for the stairs going up to the top floor. Kevin came out to the cabin on Friday and we discussed the options for the staircase. I was hoping to put in a spiral staircase for this section of the stairway but, the local authority building inspector has informed me that they are no longer permitted. Apparently, fireman can't carry people down spiral staircases. I didn't bother to point out to him that my place isn't covered by any fire fighting service (reflected in my insurance by the way). I didn't want to irritate him. You know how difficult minor civil servants can be if they are so minded and one of those is the last thing I need at the moment.


The new wall.
 I also did a little plumbing work. After the water line was installed I just left it coming into the basement without trimming it or attaching anything else to it. I thought it was timely to tidy things up as I will shortly be doing more work in this area and didn't want the excess pipeline getting in the way.

3/4 inch plywood ready to take the water manifold and other plumbing.


Closer up you can see the elbow joint and shut off valve. Next up will be a pressure reduction valve, then a metre and then the manifold that will distribute the water around the house. 
Today the sun came out for more than five minutes for the first time since the roof was finished and it brightened everything up, from the sky to my spirits.

I also light the stove occasionally not that it heats the house up at all. The heat just rises and goes out through the eves. It does keep the local area nice and warm however and it is good for morale, especially when I use it to warm up my lunch.

I should have some contractor help next week. Tex and Keith (who was living next door to me but has now moved to one of the other cabins, which is more suitable for him and his wife and daughter because it has two bedrooms) are coming out to help. Keith is a wizard with small engines and so I am going to get him to tune up my quad, which has been playing up a bit recently and which is desperately needed for snow ploughing.

A few people have been in touch with me recently expressing concern about my health and morale. I imagine there are other readers who have similar thoughts. I publicly thank you all for your concern and would like to reassure you all that I am in good shape physically and my morale is high. I don't take much time  off because things have dragged out long enough and I want to be able to receive visitors, especially family, as soon as I can. Those of you that know me well will also know that I am not very good at doing nothing. I like having something to do, actually at the moment I need something to do, especially something I enjoy doing and I am still enjoying this, including the challenges that it involves - well most of them at any rate.

A few people have being trying to get in touch with me via email, with limited success. The best email address for me is christopher_walch@hotmail.com. Feel free to drop me a line if you wish.